
Run Your First Crawl
Crawl a site end to end with the Digispot SEO Spider desktop app, then read the Page, Device, and Site scores and work the issues by severity.
This is the path from a fresh install to a finished crawl you can act on. The Spider applies 313 checks across 25 categories to every page. It keeps all data on your machine. It follows one core loop: Discover → Prioritize → Understand → Act.
This guide assumes the app is installed and your plan is activated. If not, start with Install the desktop app — the free Scout tier crawls up to 100 pages with no card.
Before you begin
| What | Do you need it? |
|---|---|
| SEO Spider installed and activated | Yes — see Install |
| A site you can crawl | Yes — your own, a client's, or any site you're authorized to audit |
| A Google account (GSC / GA4) | Optional — connect it to weight issues by real traffic |
Step 1 — Create a project
Select New Project. This opens the Create New Project wizard: "Set up a website to audit. Each project keeps its runs, so you can track SEO improvements over time." It has three steps: Basics, Local SEO & Languages, and Advanced. Only the first is required. The other two have working defaults. A step rail on the left tracks progress, and you can move back to any completed step.
Basics
The essentials of what to crawl. Most projects only need this step.
| Field | Required? | What to enter |
|---|---|---|
| Website URL | Yes | The site's root URL, e.g. https://example.com. It's validated on entry and cannot be changed after the project is created |
| Industry | Yes | Your vertical — drives AI recommendations and industry benchmarks |
| Devices | — | Desktop, Mobile, Tablet pills. Scout (free) crawls mobile-only; Desktop and Tablet need Tracker or Leader |
| Pages per audit | Yes | Default 100, up to your plan's cap. Paid plans add Crawl every page in my sitemap to auto-detect the count |
| Project name | No | Auto-fills from the domain — leave blank or set 3–50 characters |
| Description | No | A short note about the site; feeds AI recommendations |
| What we check | Yes | Essentials (recommended — critical, high, and medium issues) or Also capture low-priority issues (thorough, paid) |
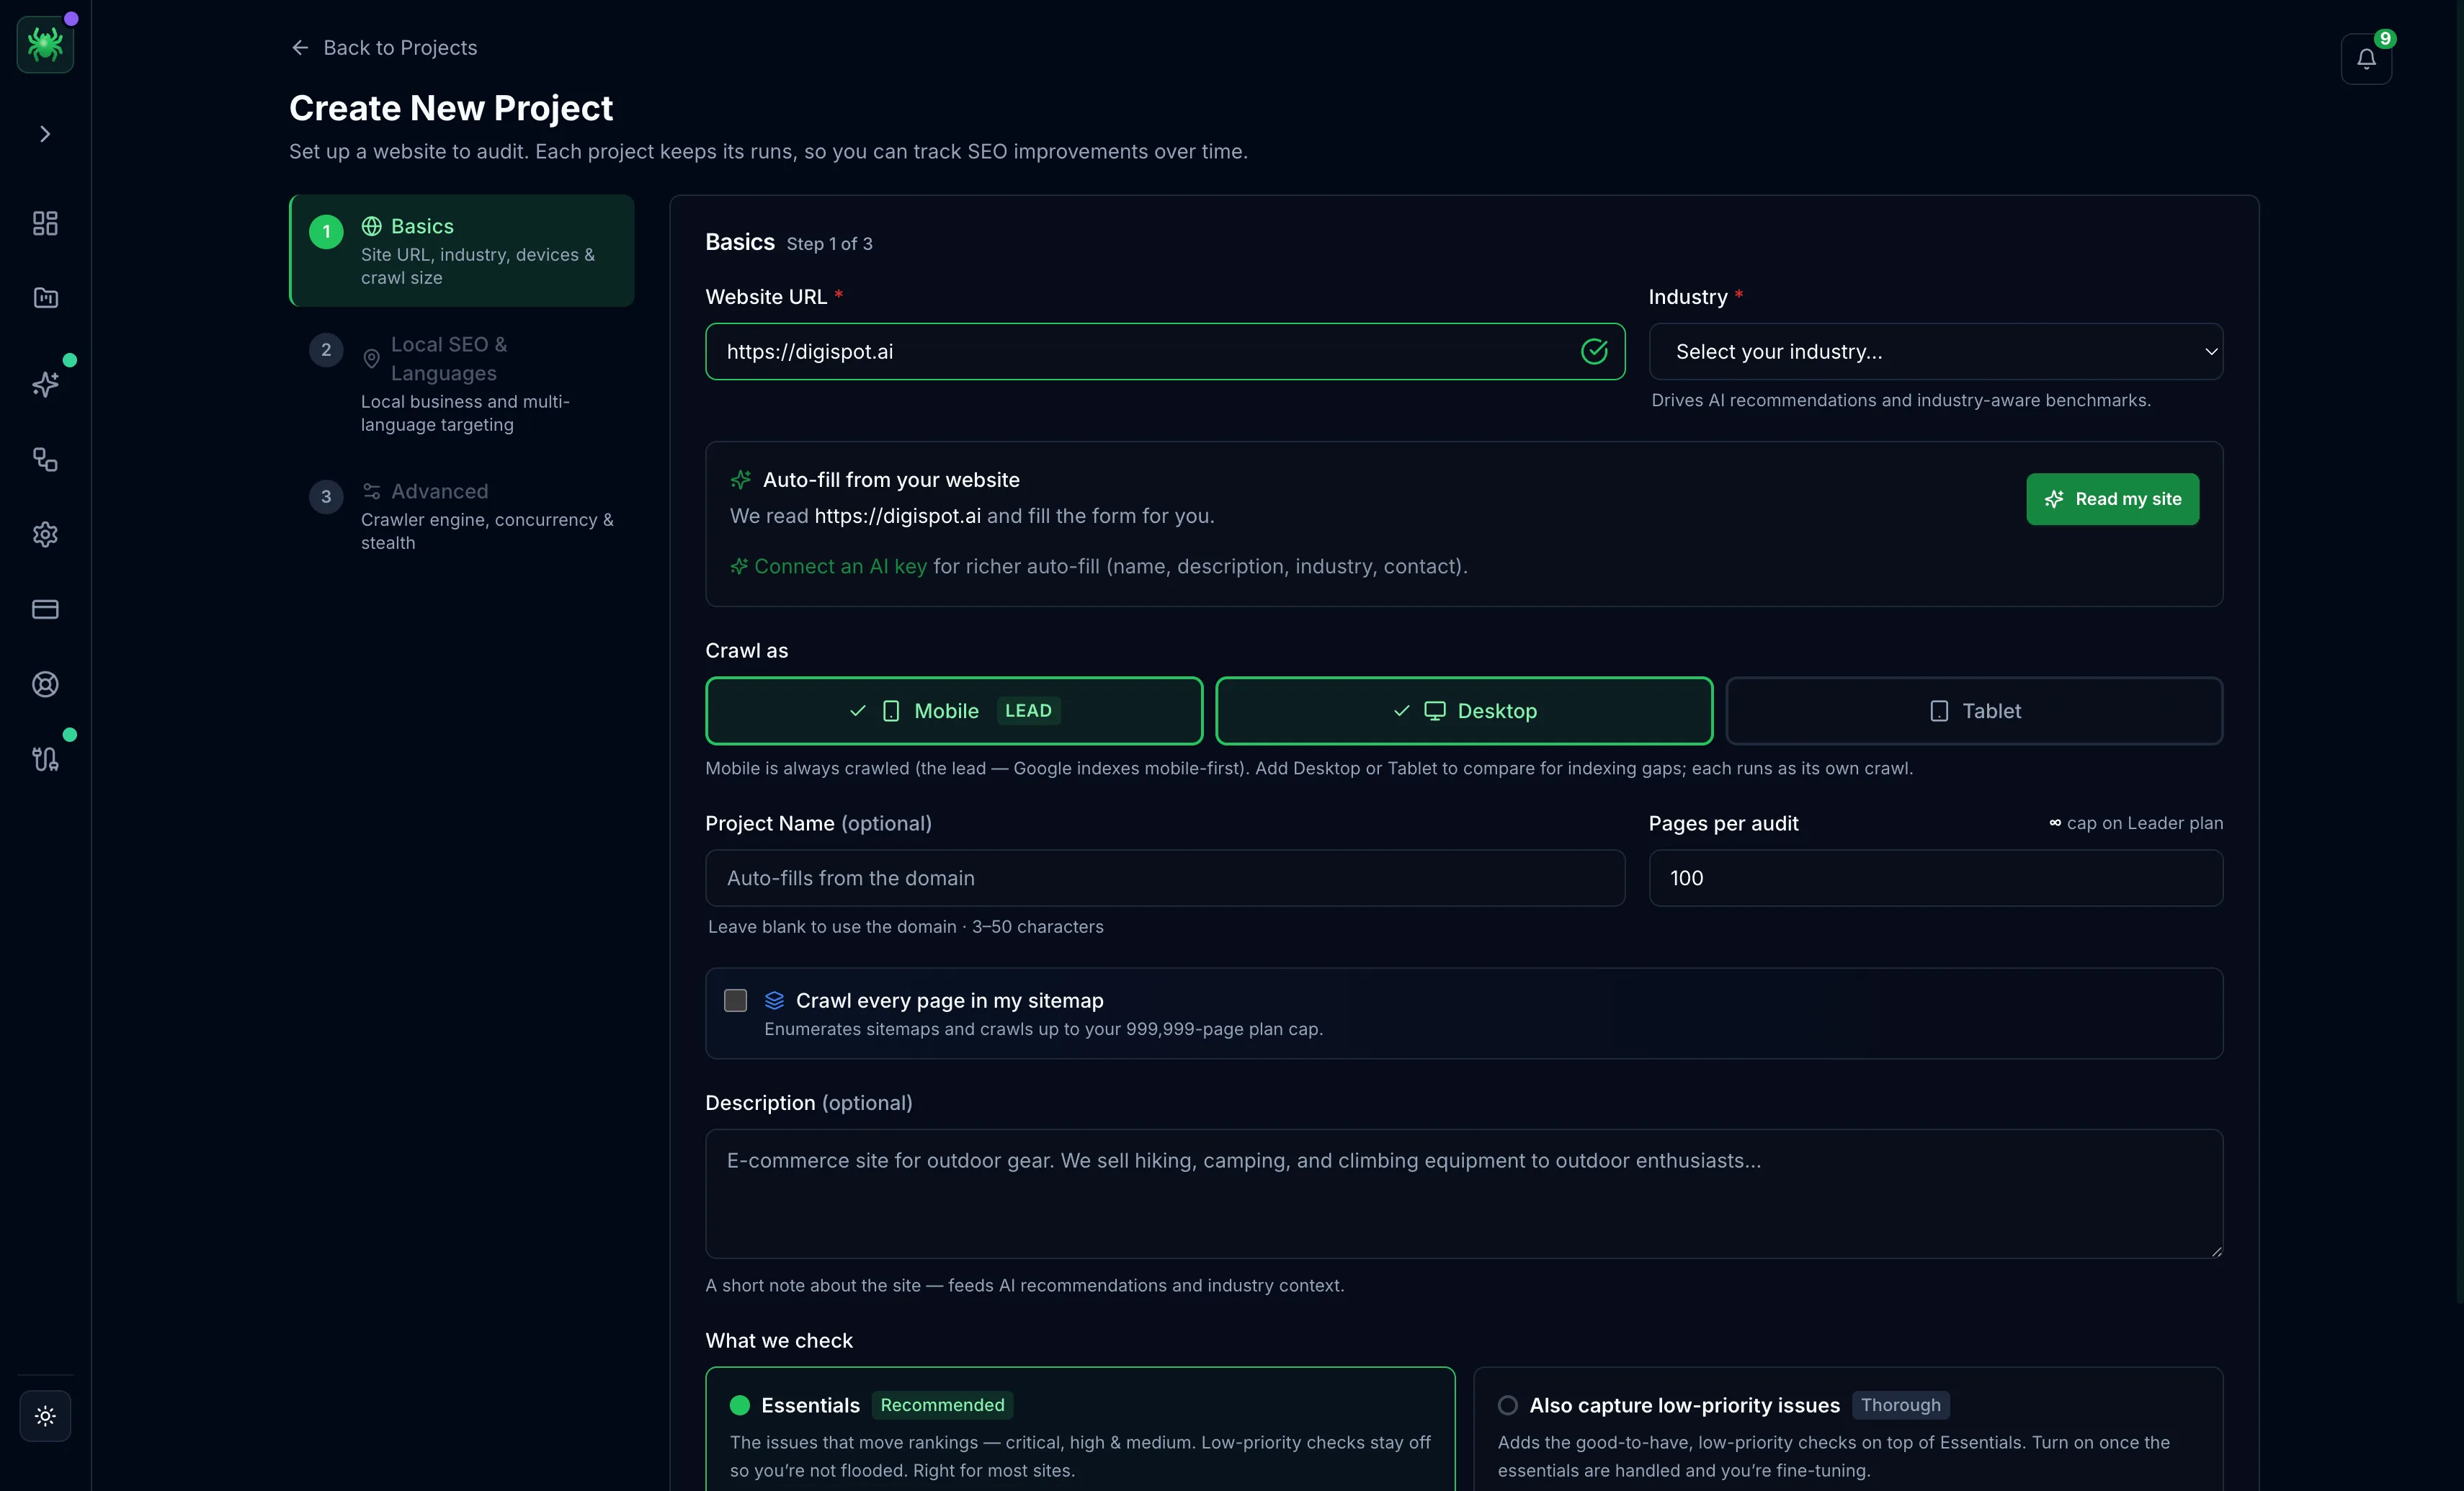
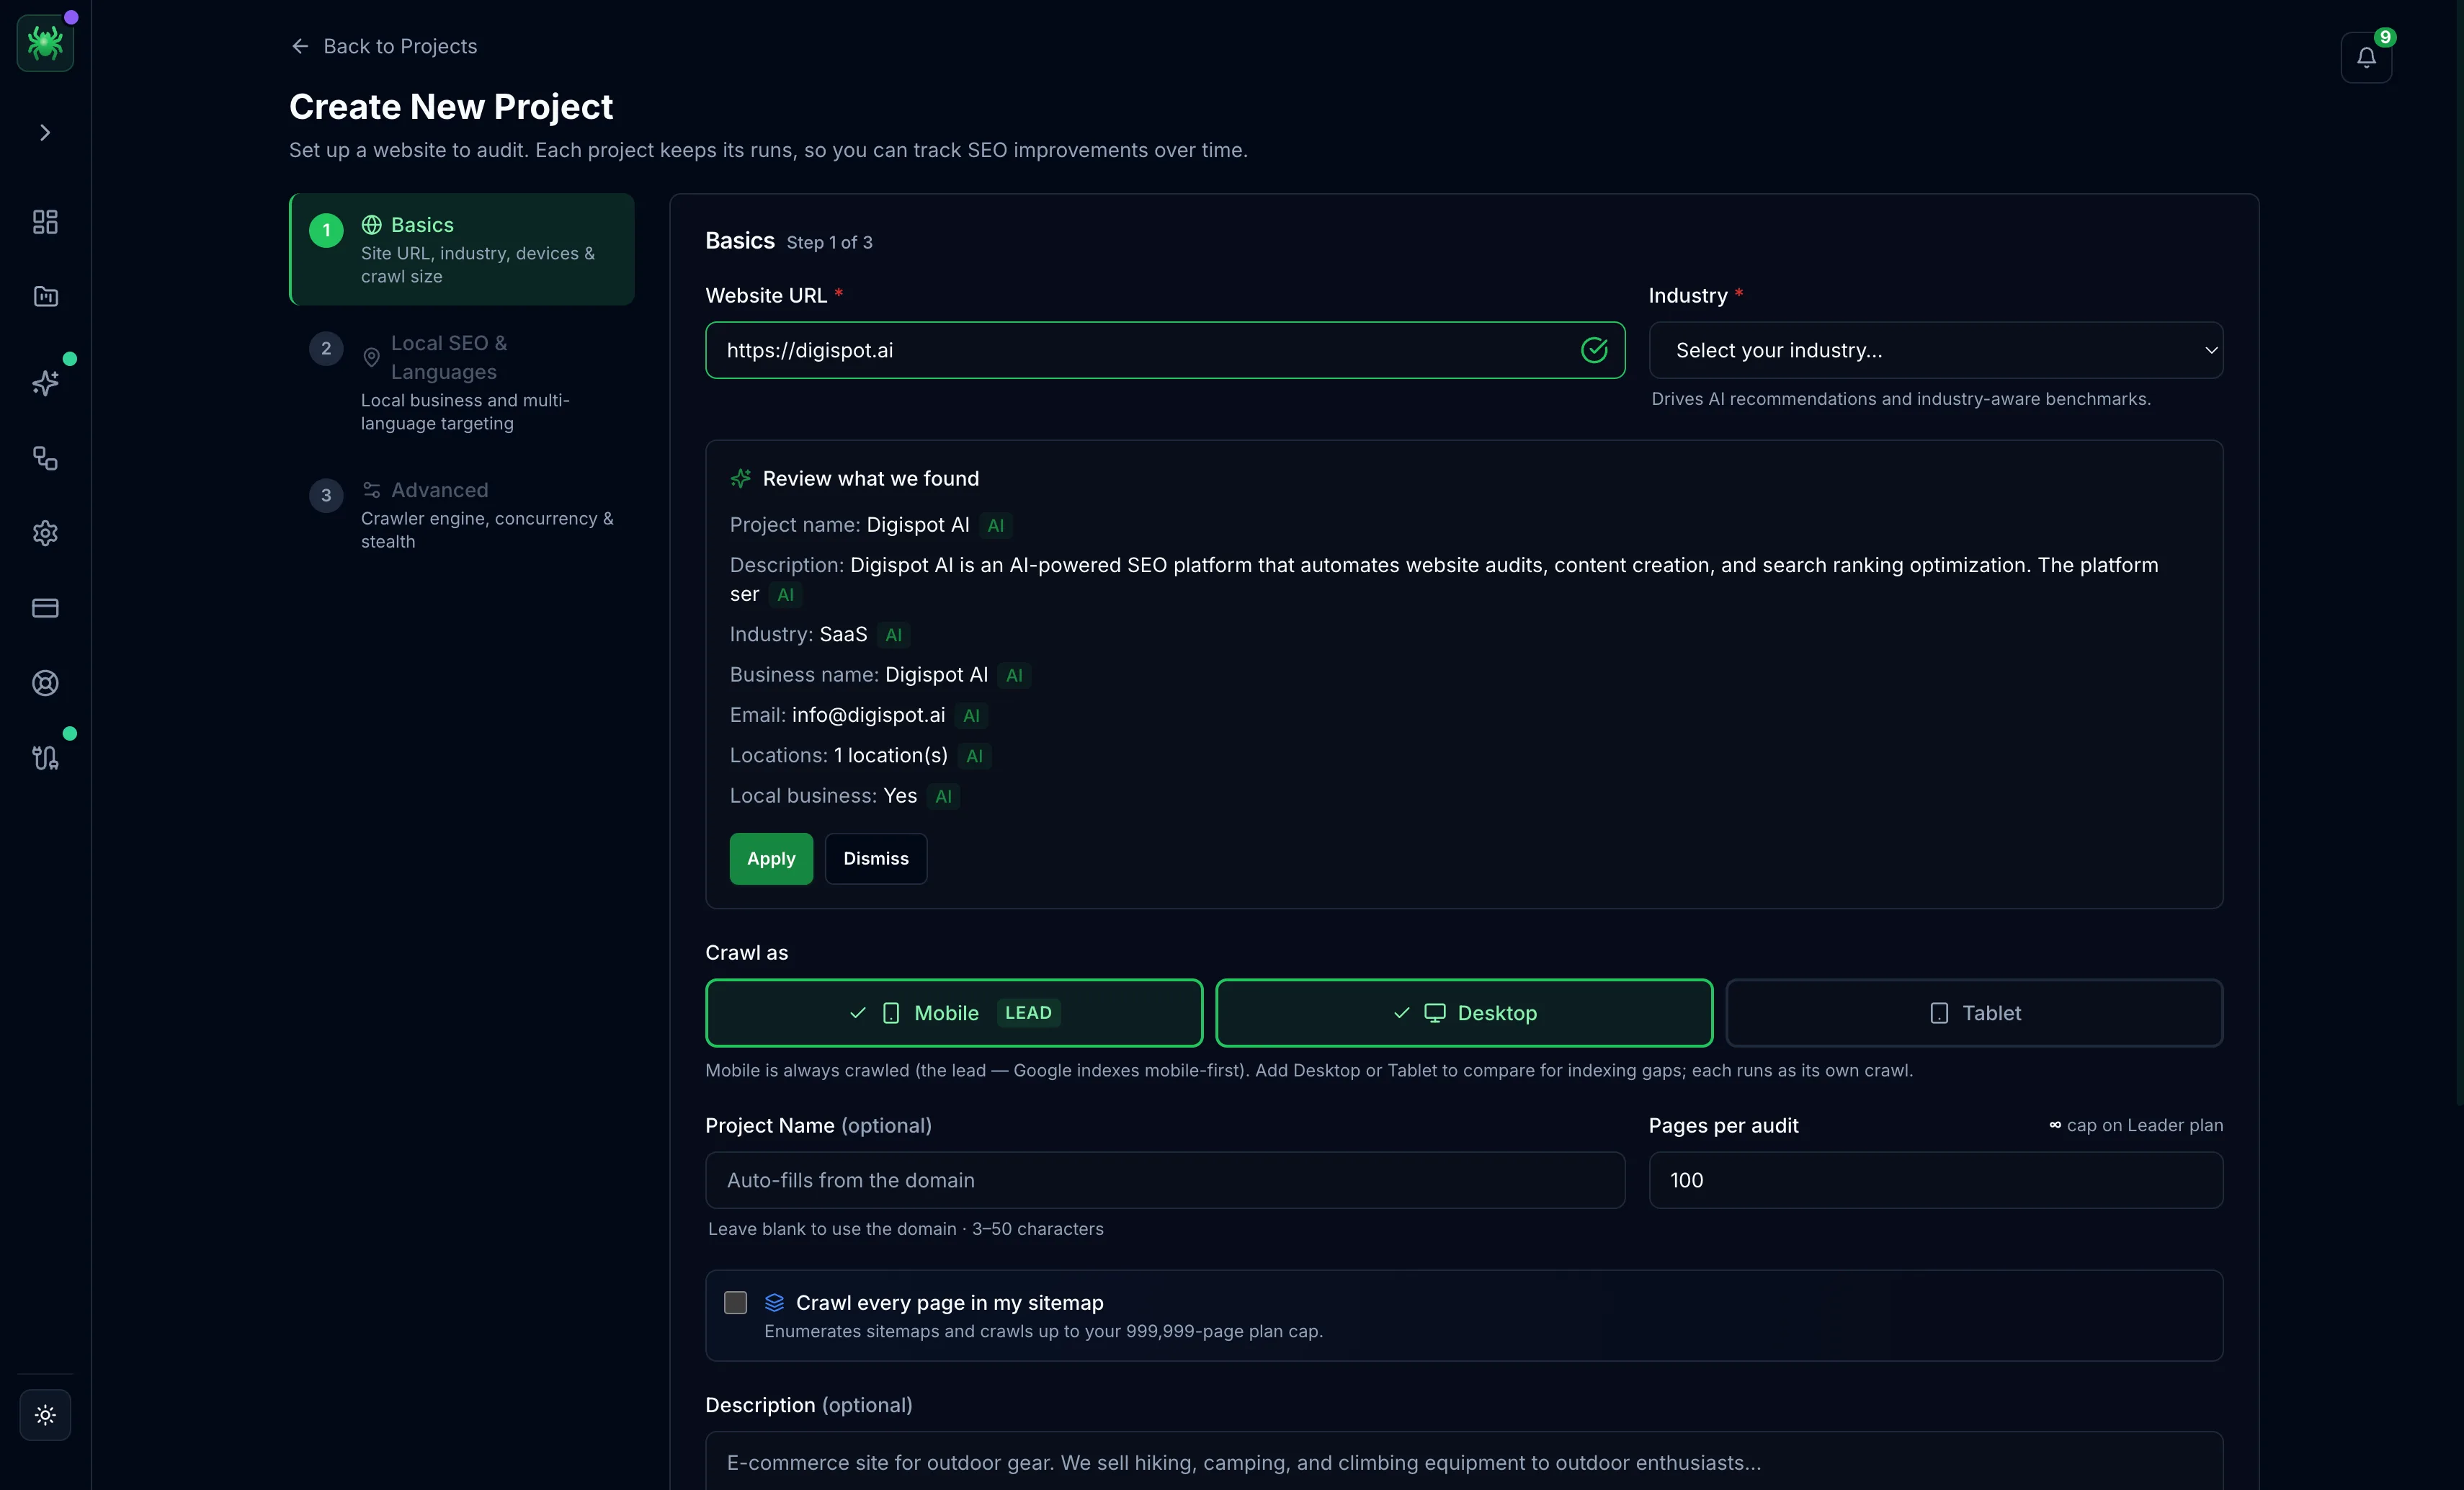
After entering the URL, use Read my site to pre-fill the industry, description, and other fields from your homepage. On Scout this read is deterministic; paid plans add an AI-written summary.
Local SEO & Languages
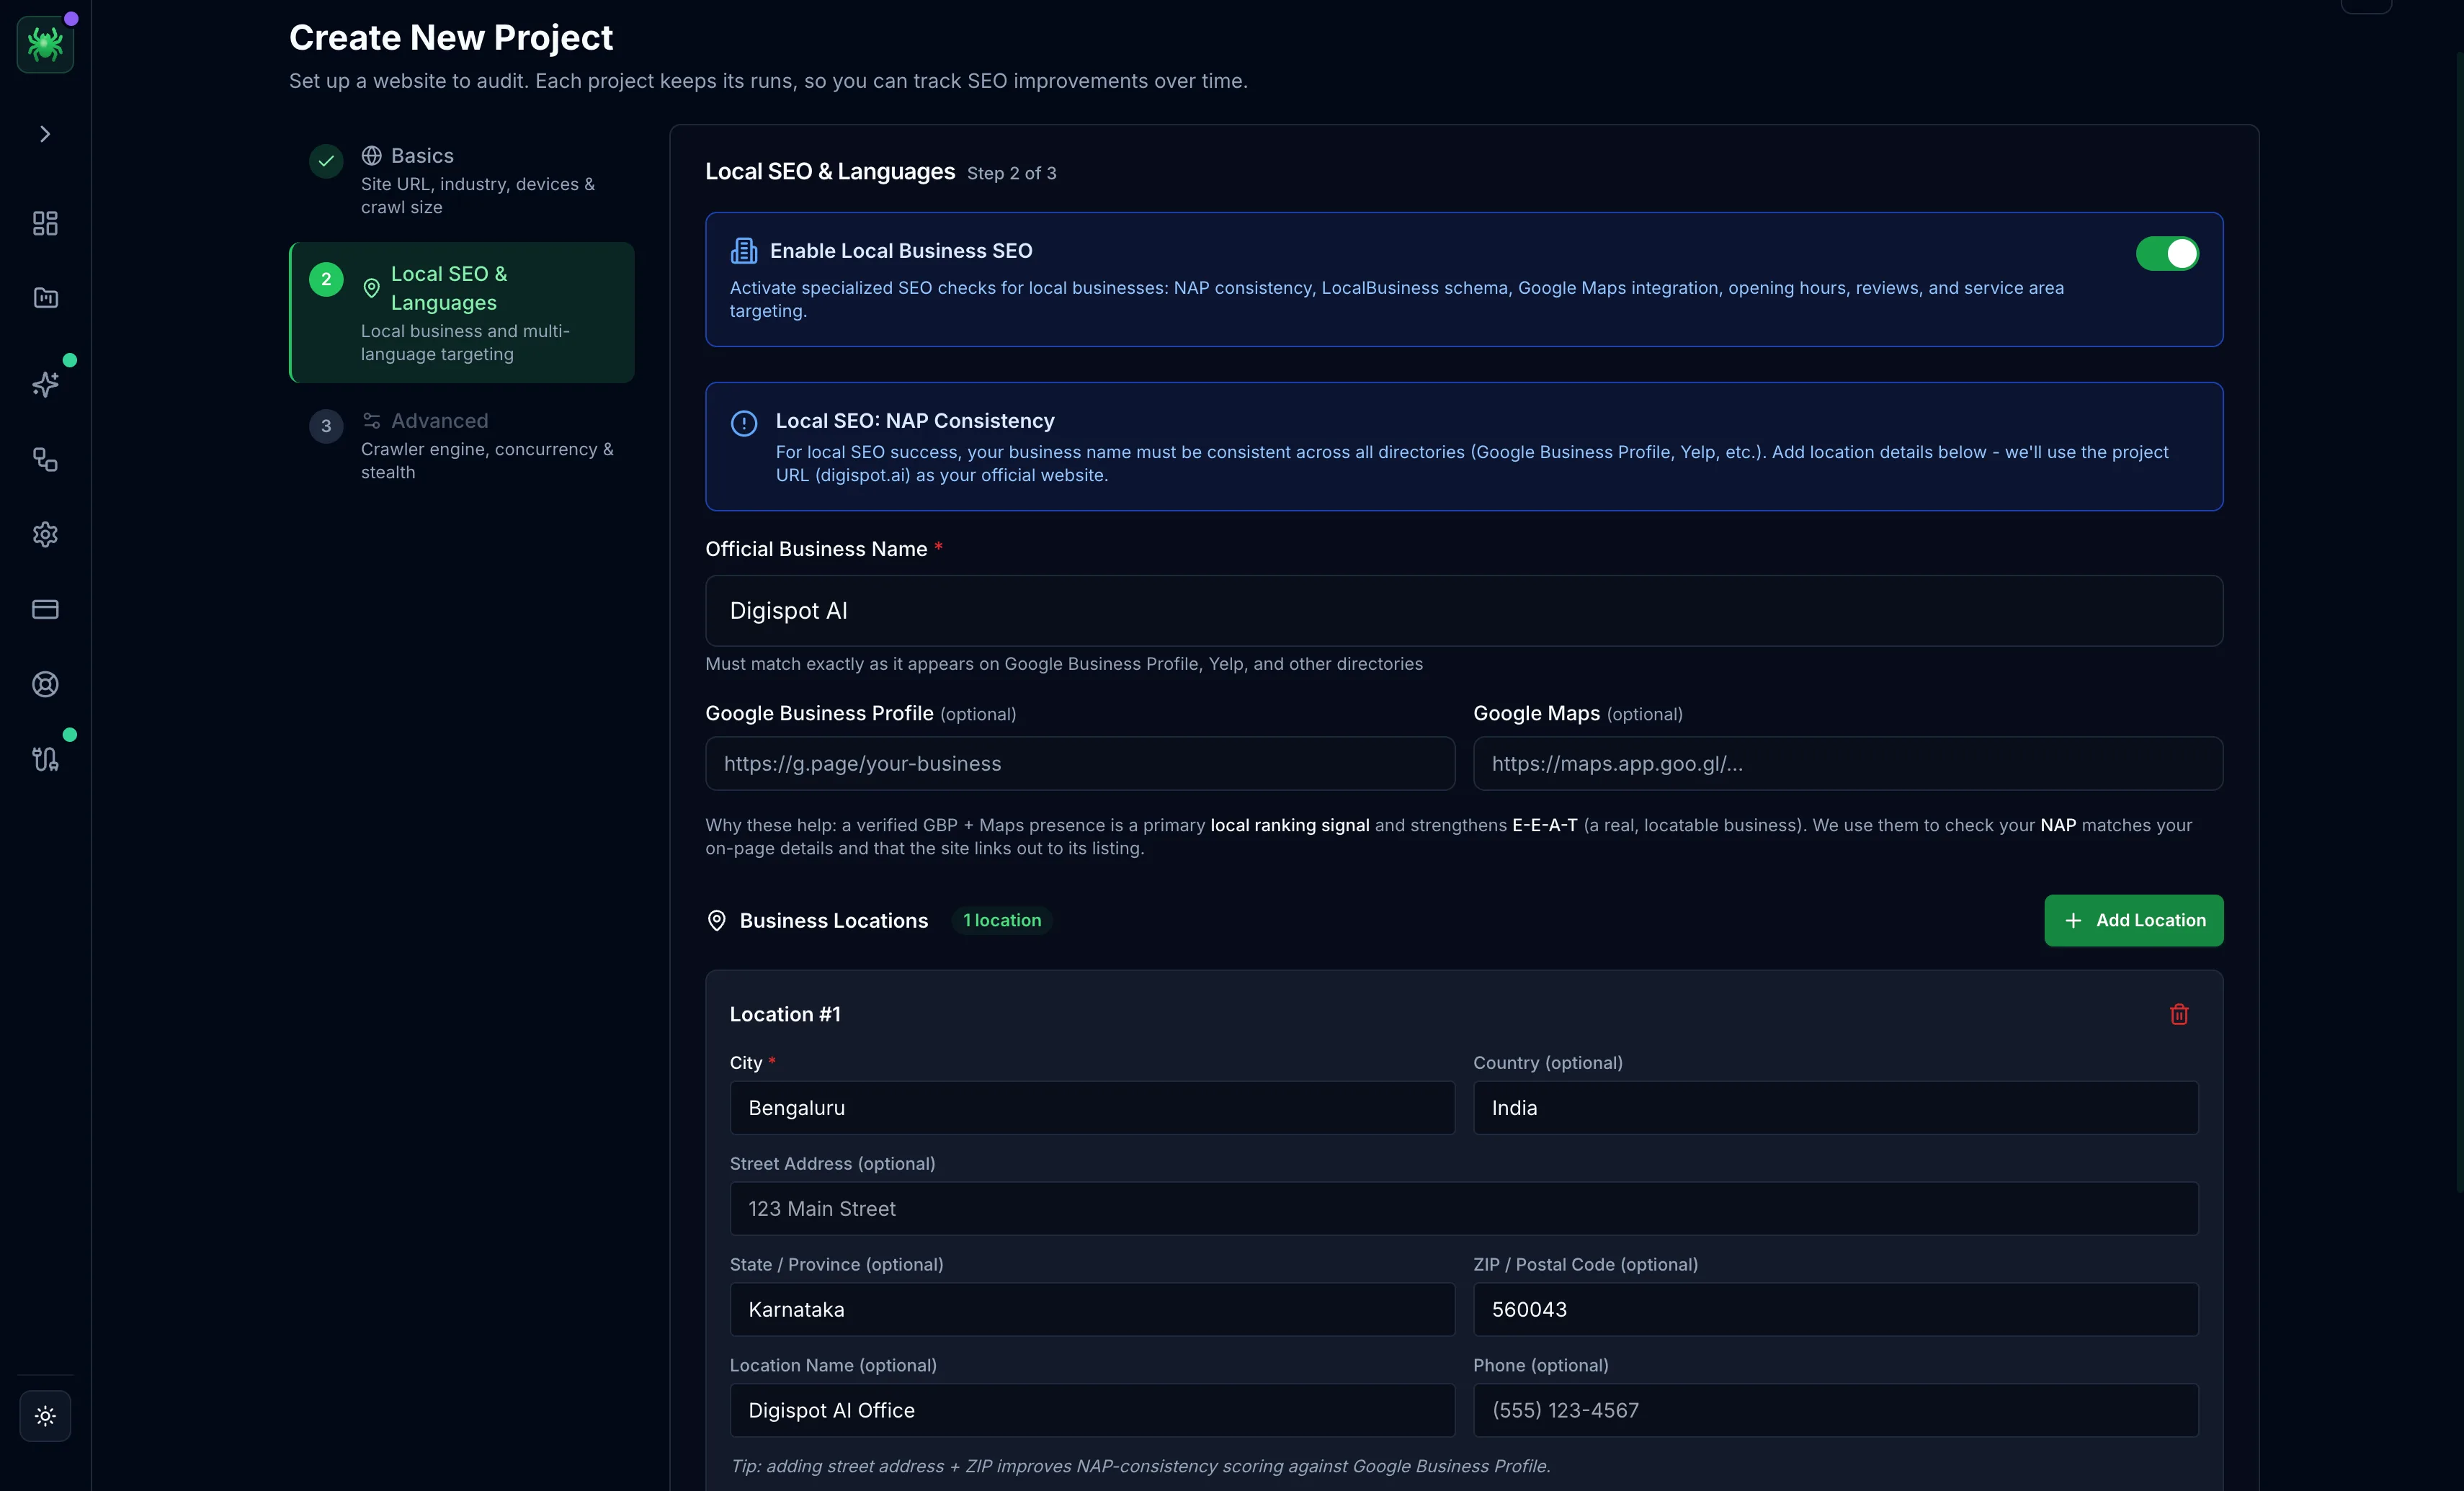
Skip this step unless the site serves a physical location or multiple languages. Enabling Local Business SEO reveals three fields. Enter the Official Business Name and match your Google Business Profile exactly. Add an optional Google Business Profile URL and one or more business locations. A target languages/regions selector drives international checks.
Advanced (optional)
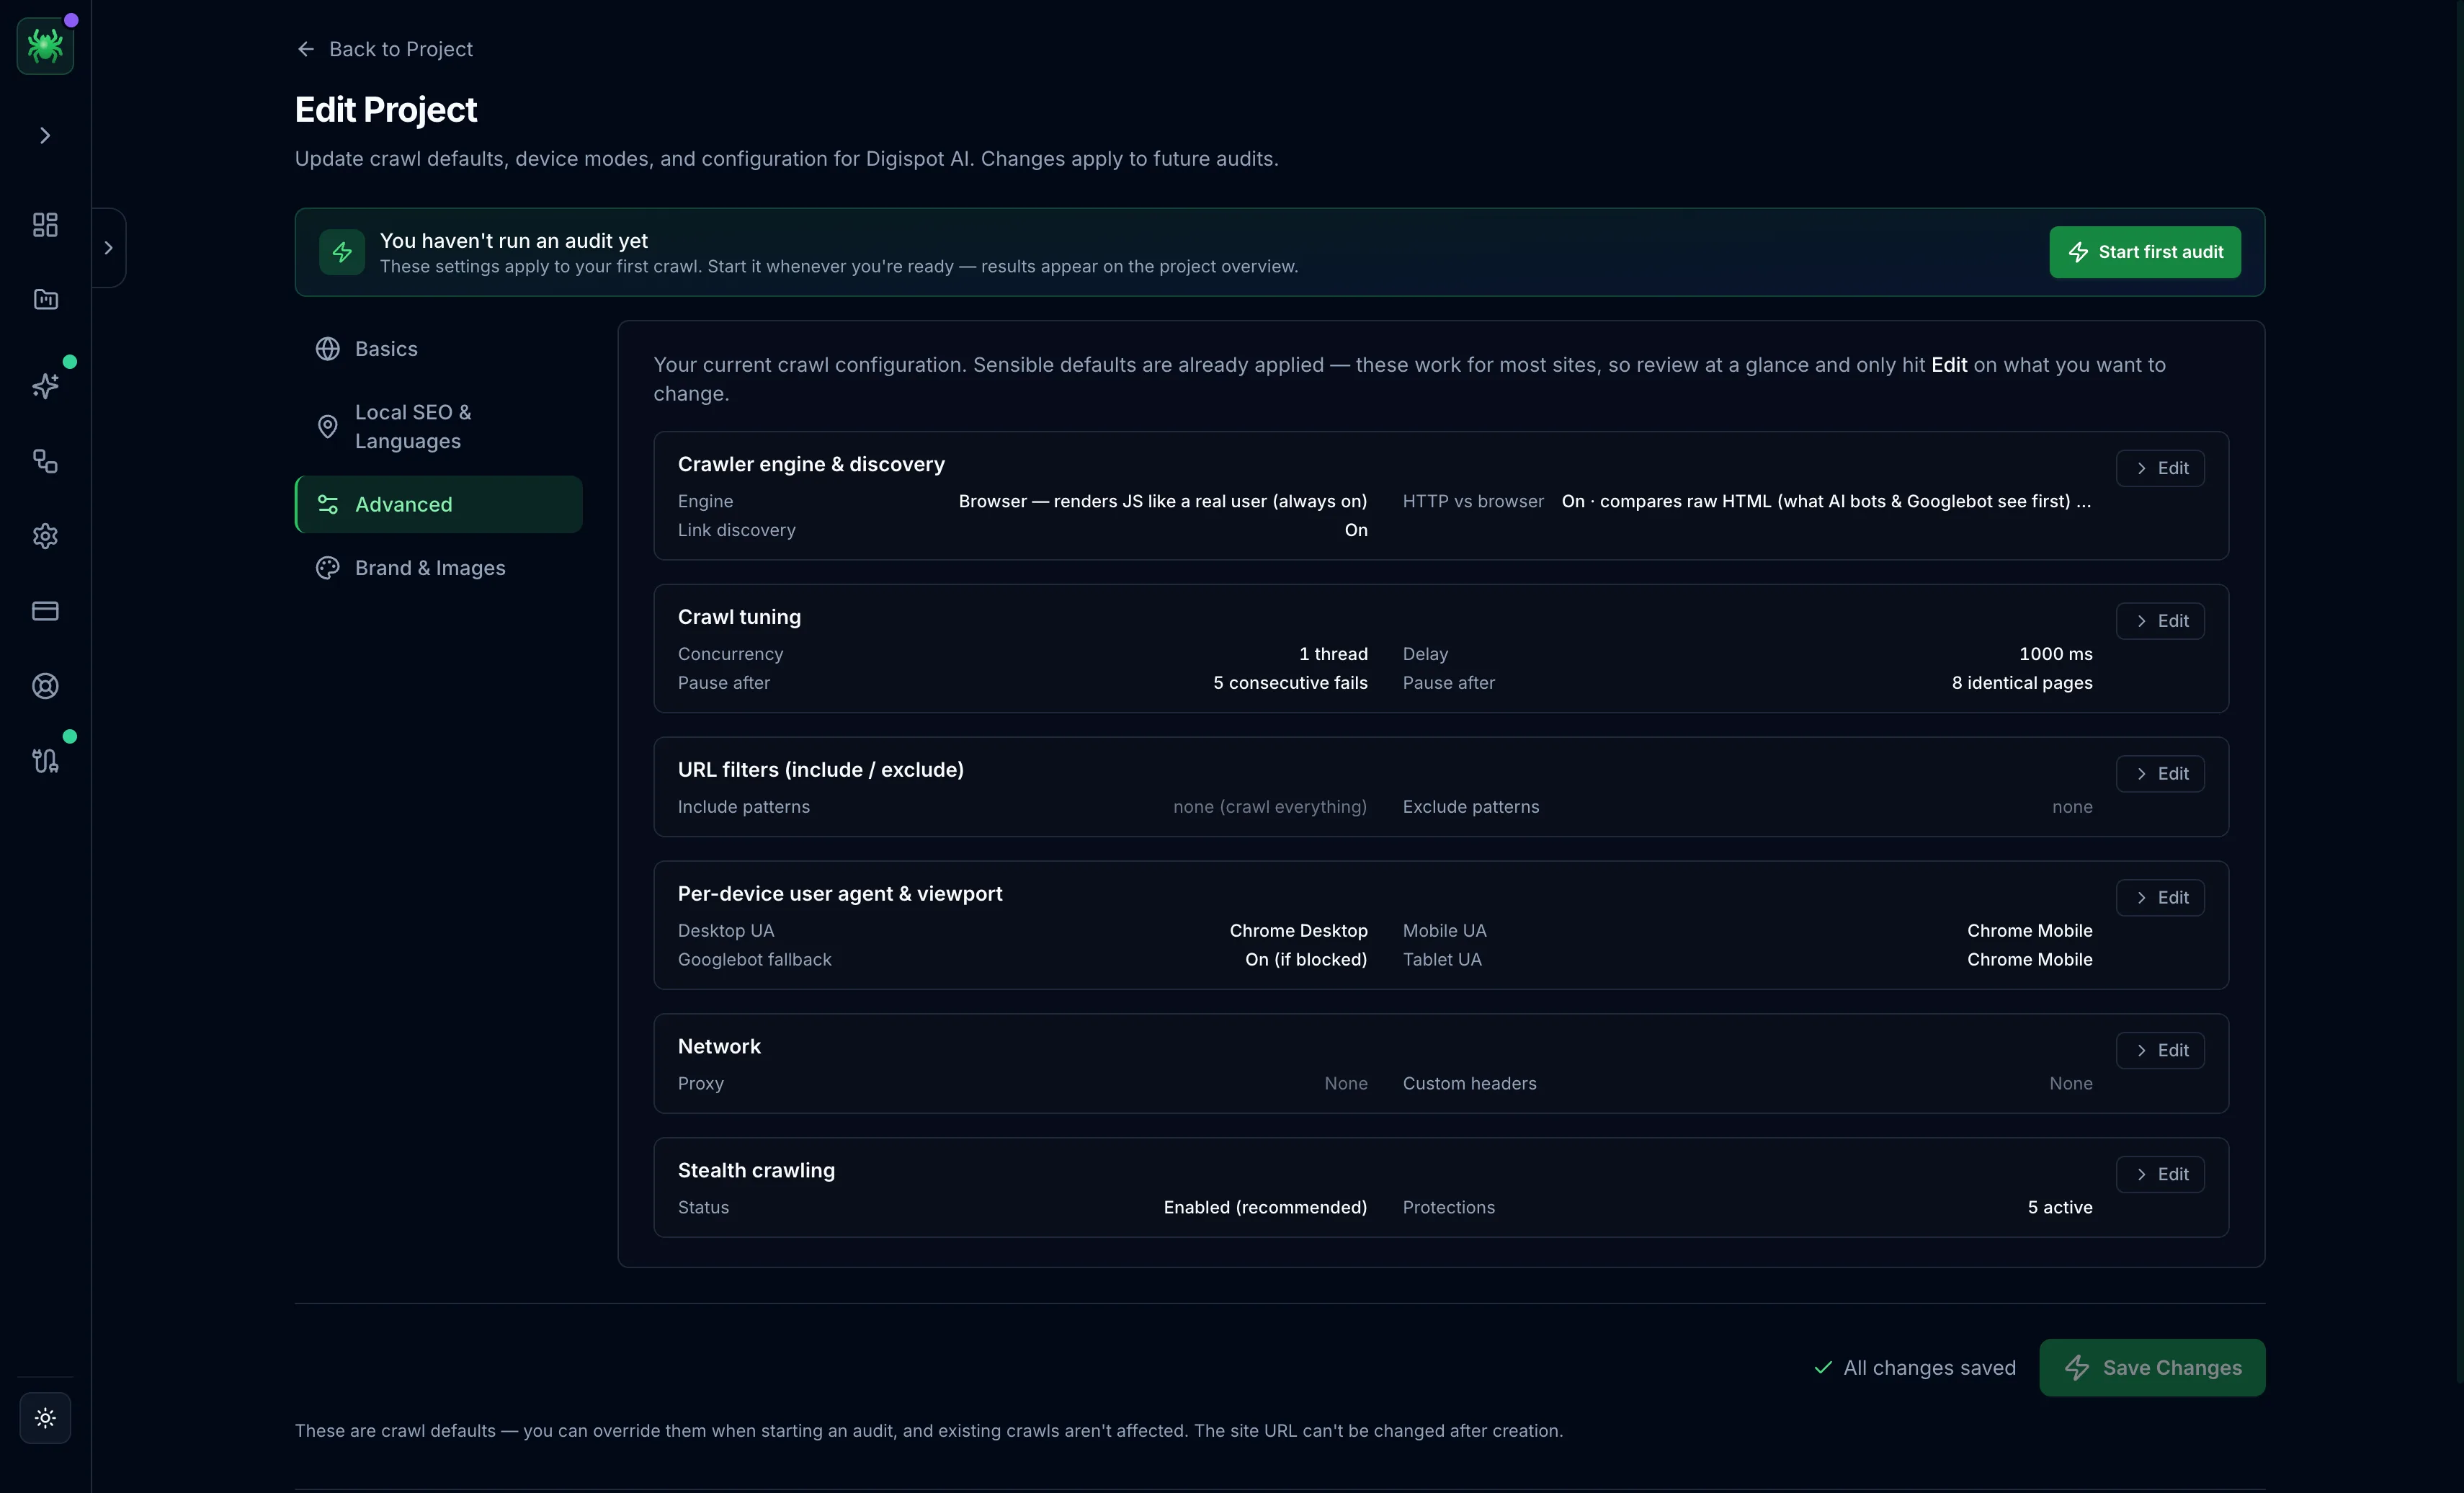
Sensible defaults are set for every field here. Open it only to tune the crawl. The settings are grouped into six areas. Crawler engine & discovery compares raw HTML vs rendered page, discovers links for orphan pages, and runs post-crawl AI summaries. Crawl tuning sets concurrency, delay, and failure and identical-page thresholds. URL include / exclude filters limit what gets crawled. Per-device user agent & viewport includes a Googlebot fallback on 403. Network holds proxy and custom headers. Stealth crawling is the last group. Most of these are Tracker features. See The crawler for what each option does.
Click Create Project on the last step.
Step 2 — Start the audit
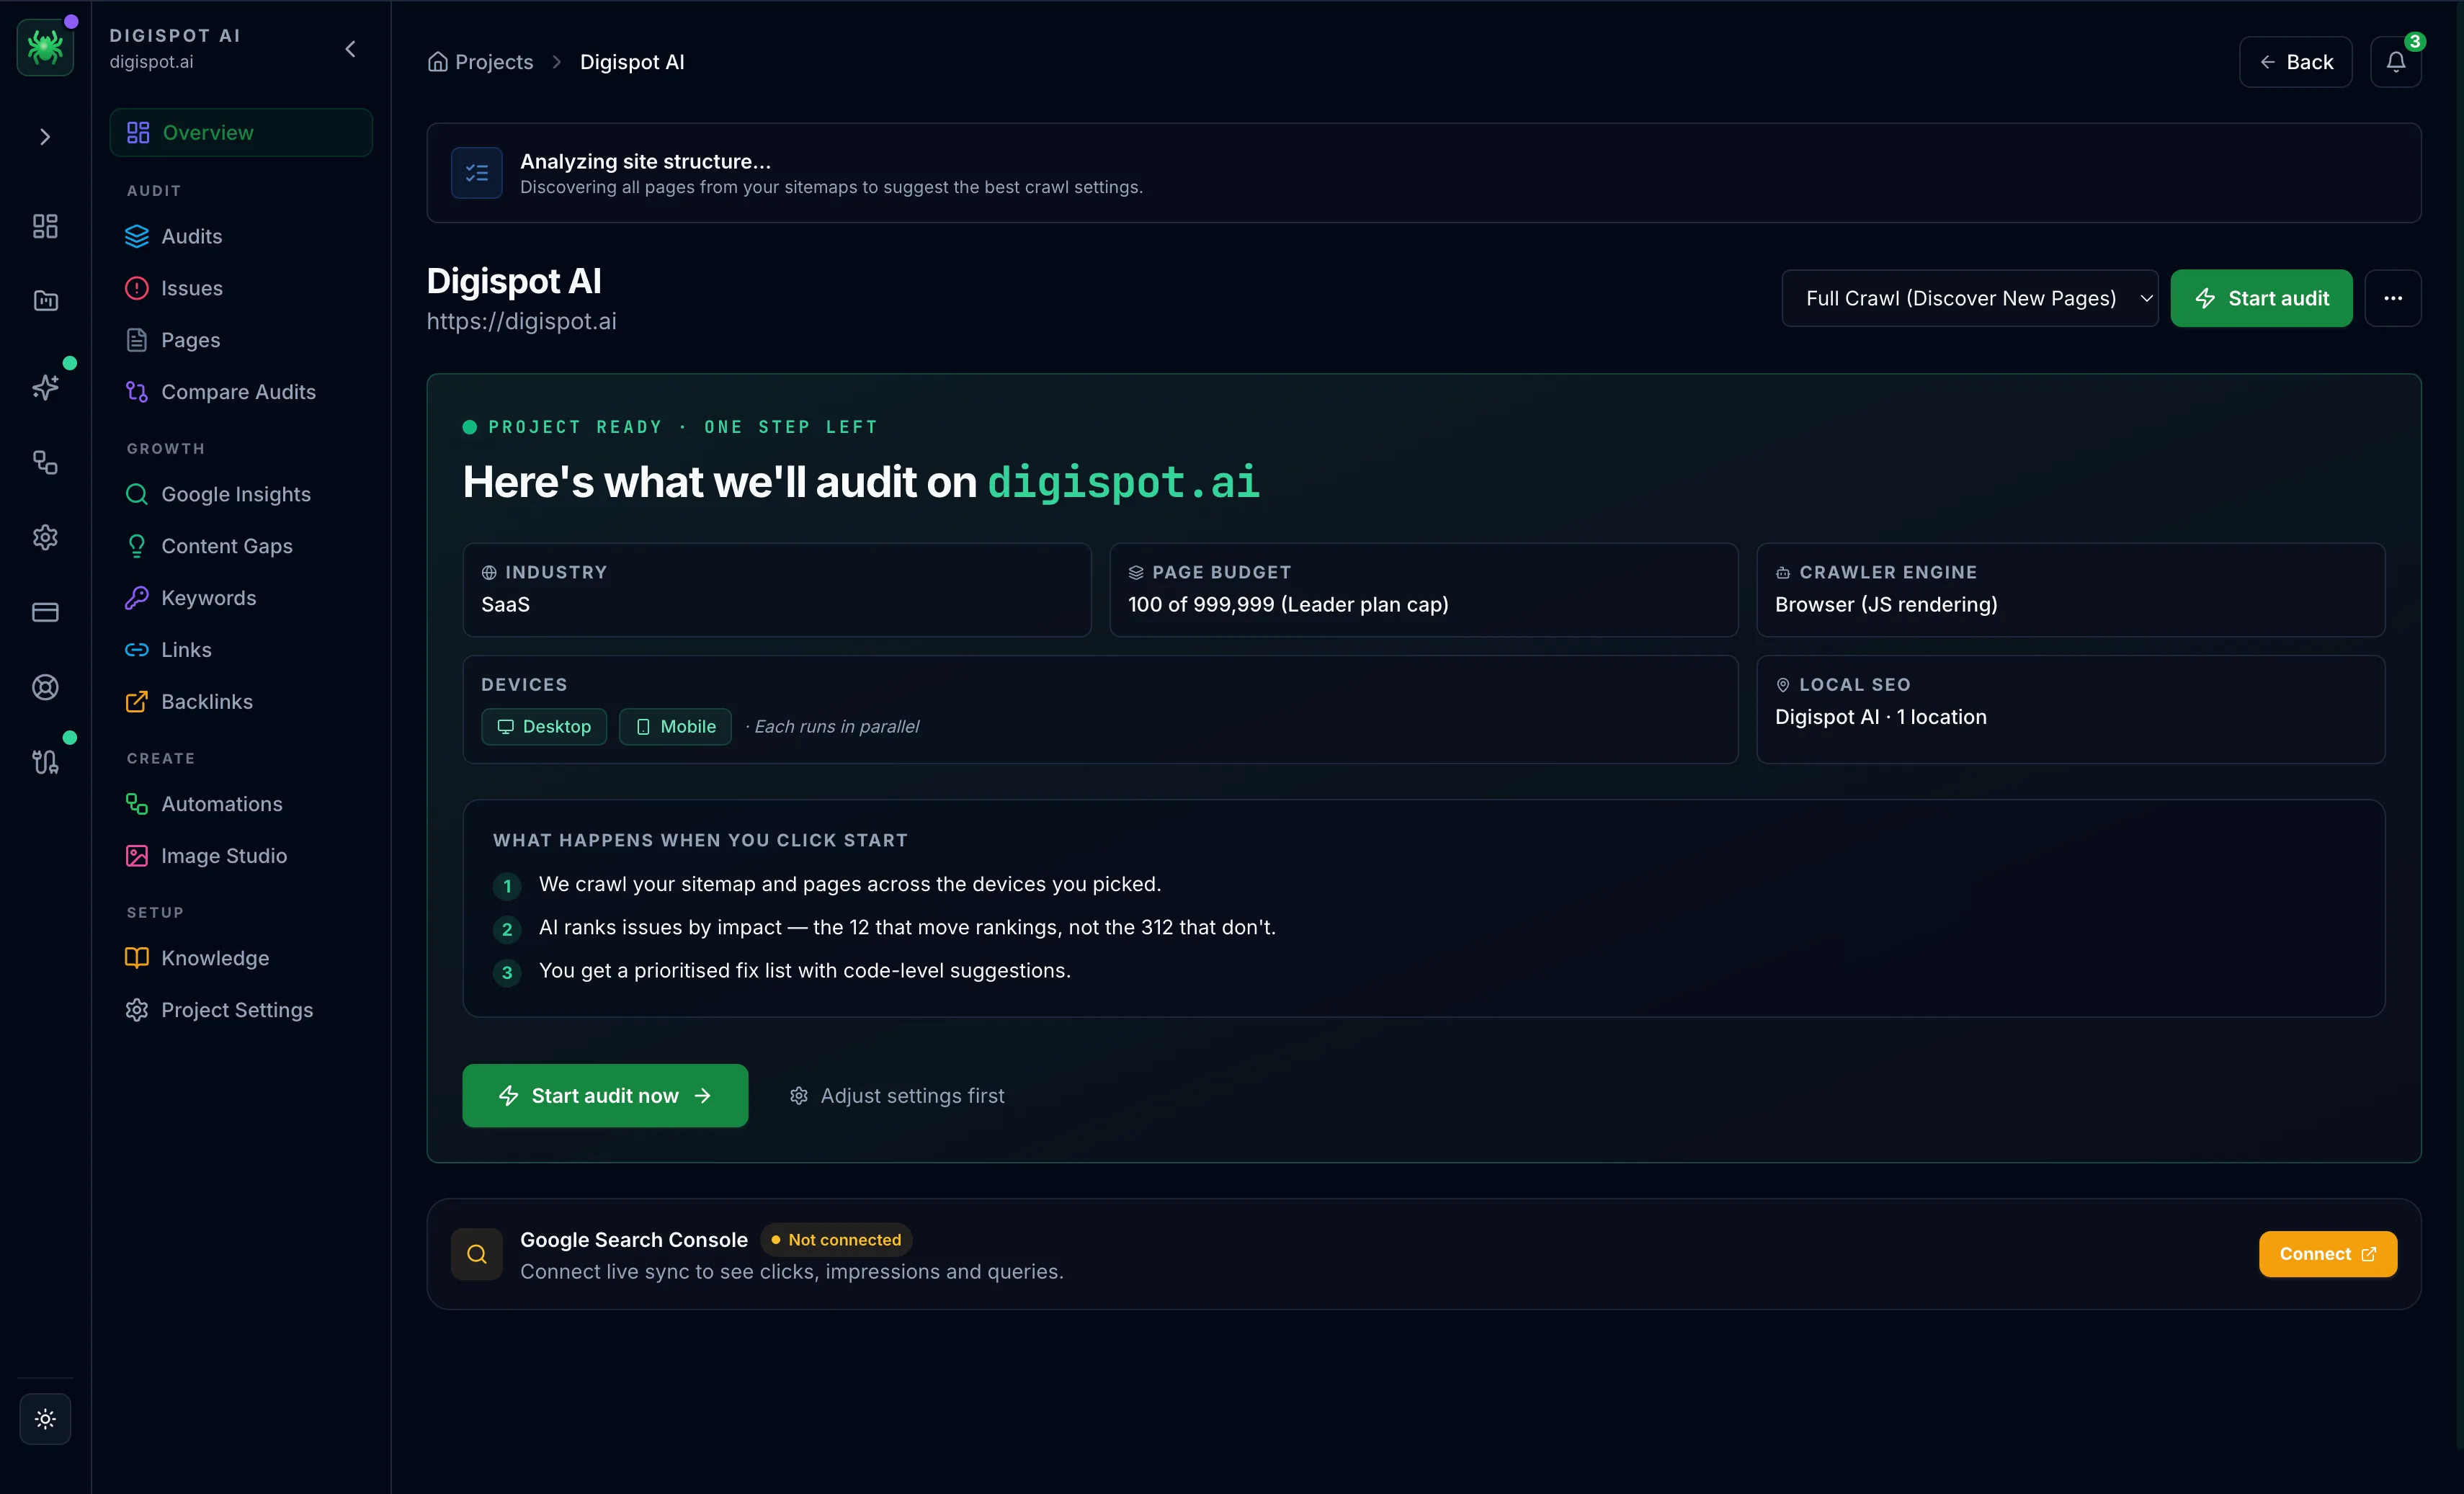
Right after the project is created, a welcome screen confirms the scope: "Here's what we'll audit on [your site]". It reads back the industry, devices, page budget, and crawler settings, alongside a What happens when you click Start summary. Select Start audit now, or Adjust settings first to reopen the configuration.
Before the crawl begins, a Ready to audit? dialog runs a quick check of your machine: network, memory, CPU, and power. Crawl speed and performance metrics are most accurate on a healthy host. The check is advisory and never blocks. Review any warnings, then select Start audit.
Step 3 — Watch the crawl
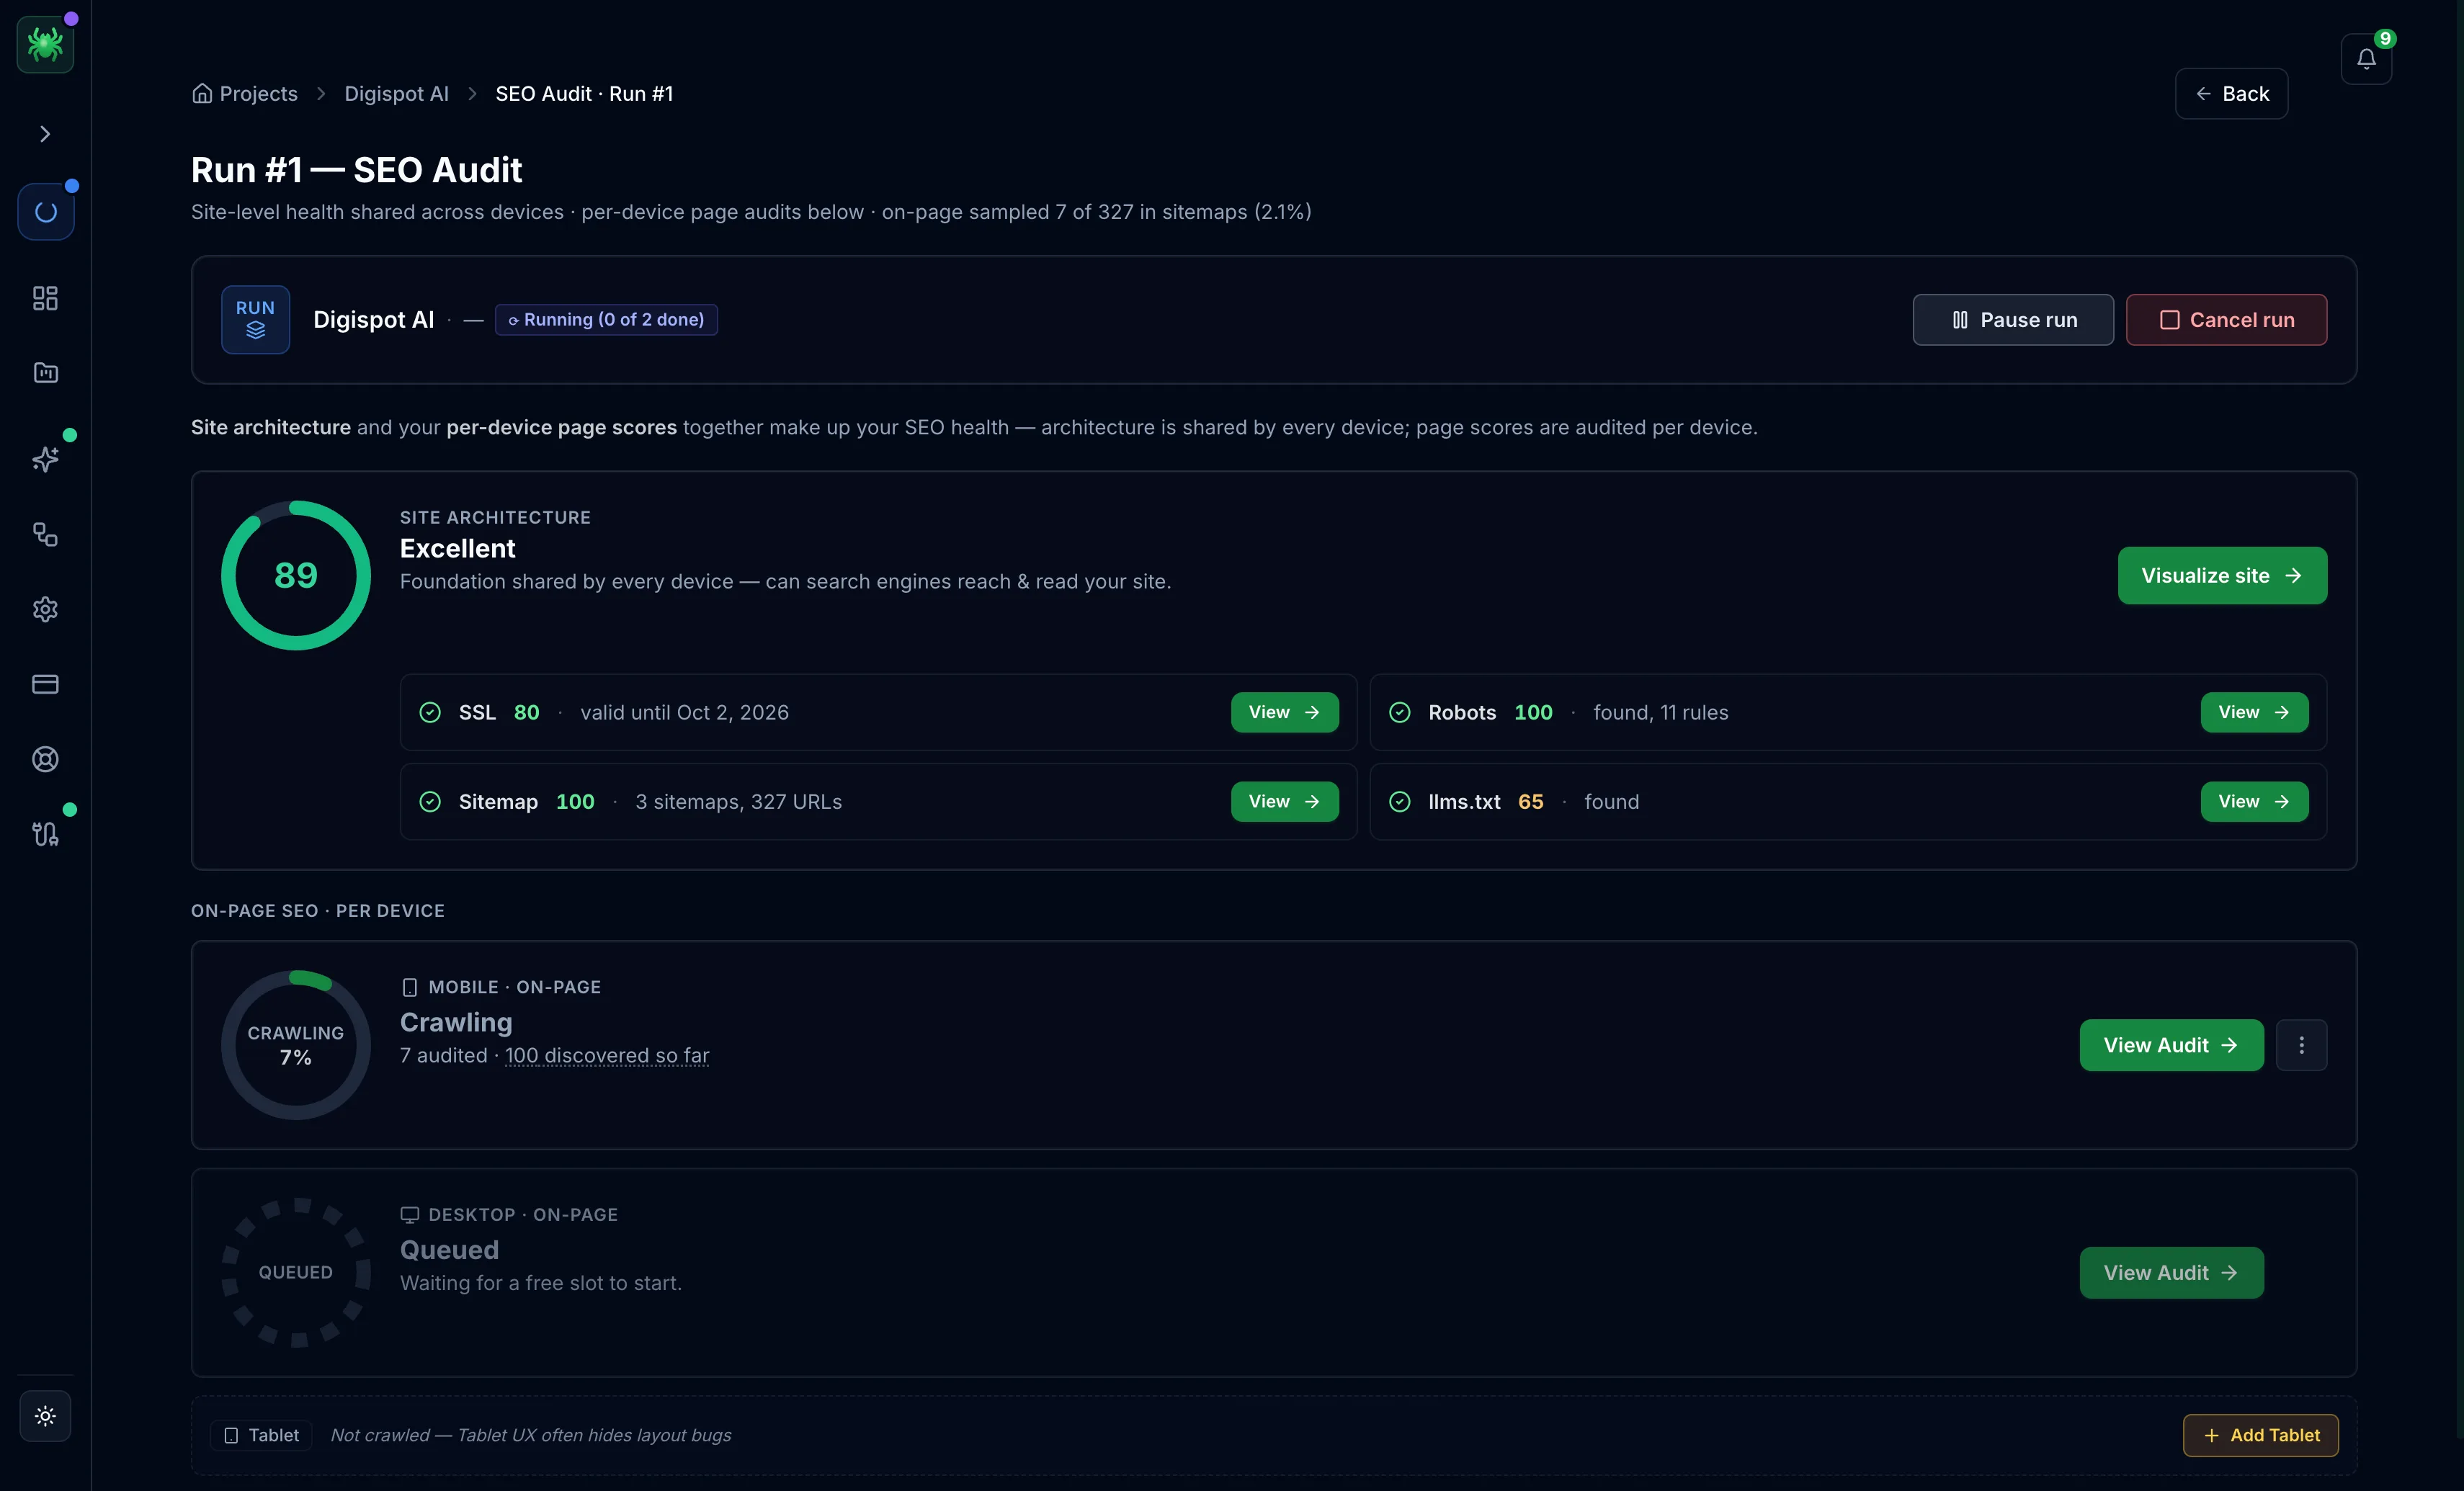
Progress appears live. The run page shows the current status and the pages audited against those discovered. It shows the Site Architecture score as soon as it's computed. You can pause or cancel the run at any point. Each device you selected runs as its own crawl. One audits while the others show Queued · waiting for a free slot, since Mobile is always crawled first as the lead.
Crawling consumes bandwidth on the target site. Lower the concurrency and raise the delay in the project's Advanced settings before crawling a production site you do not own.
Step 4 — Read the scores
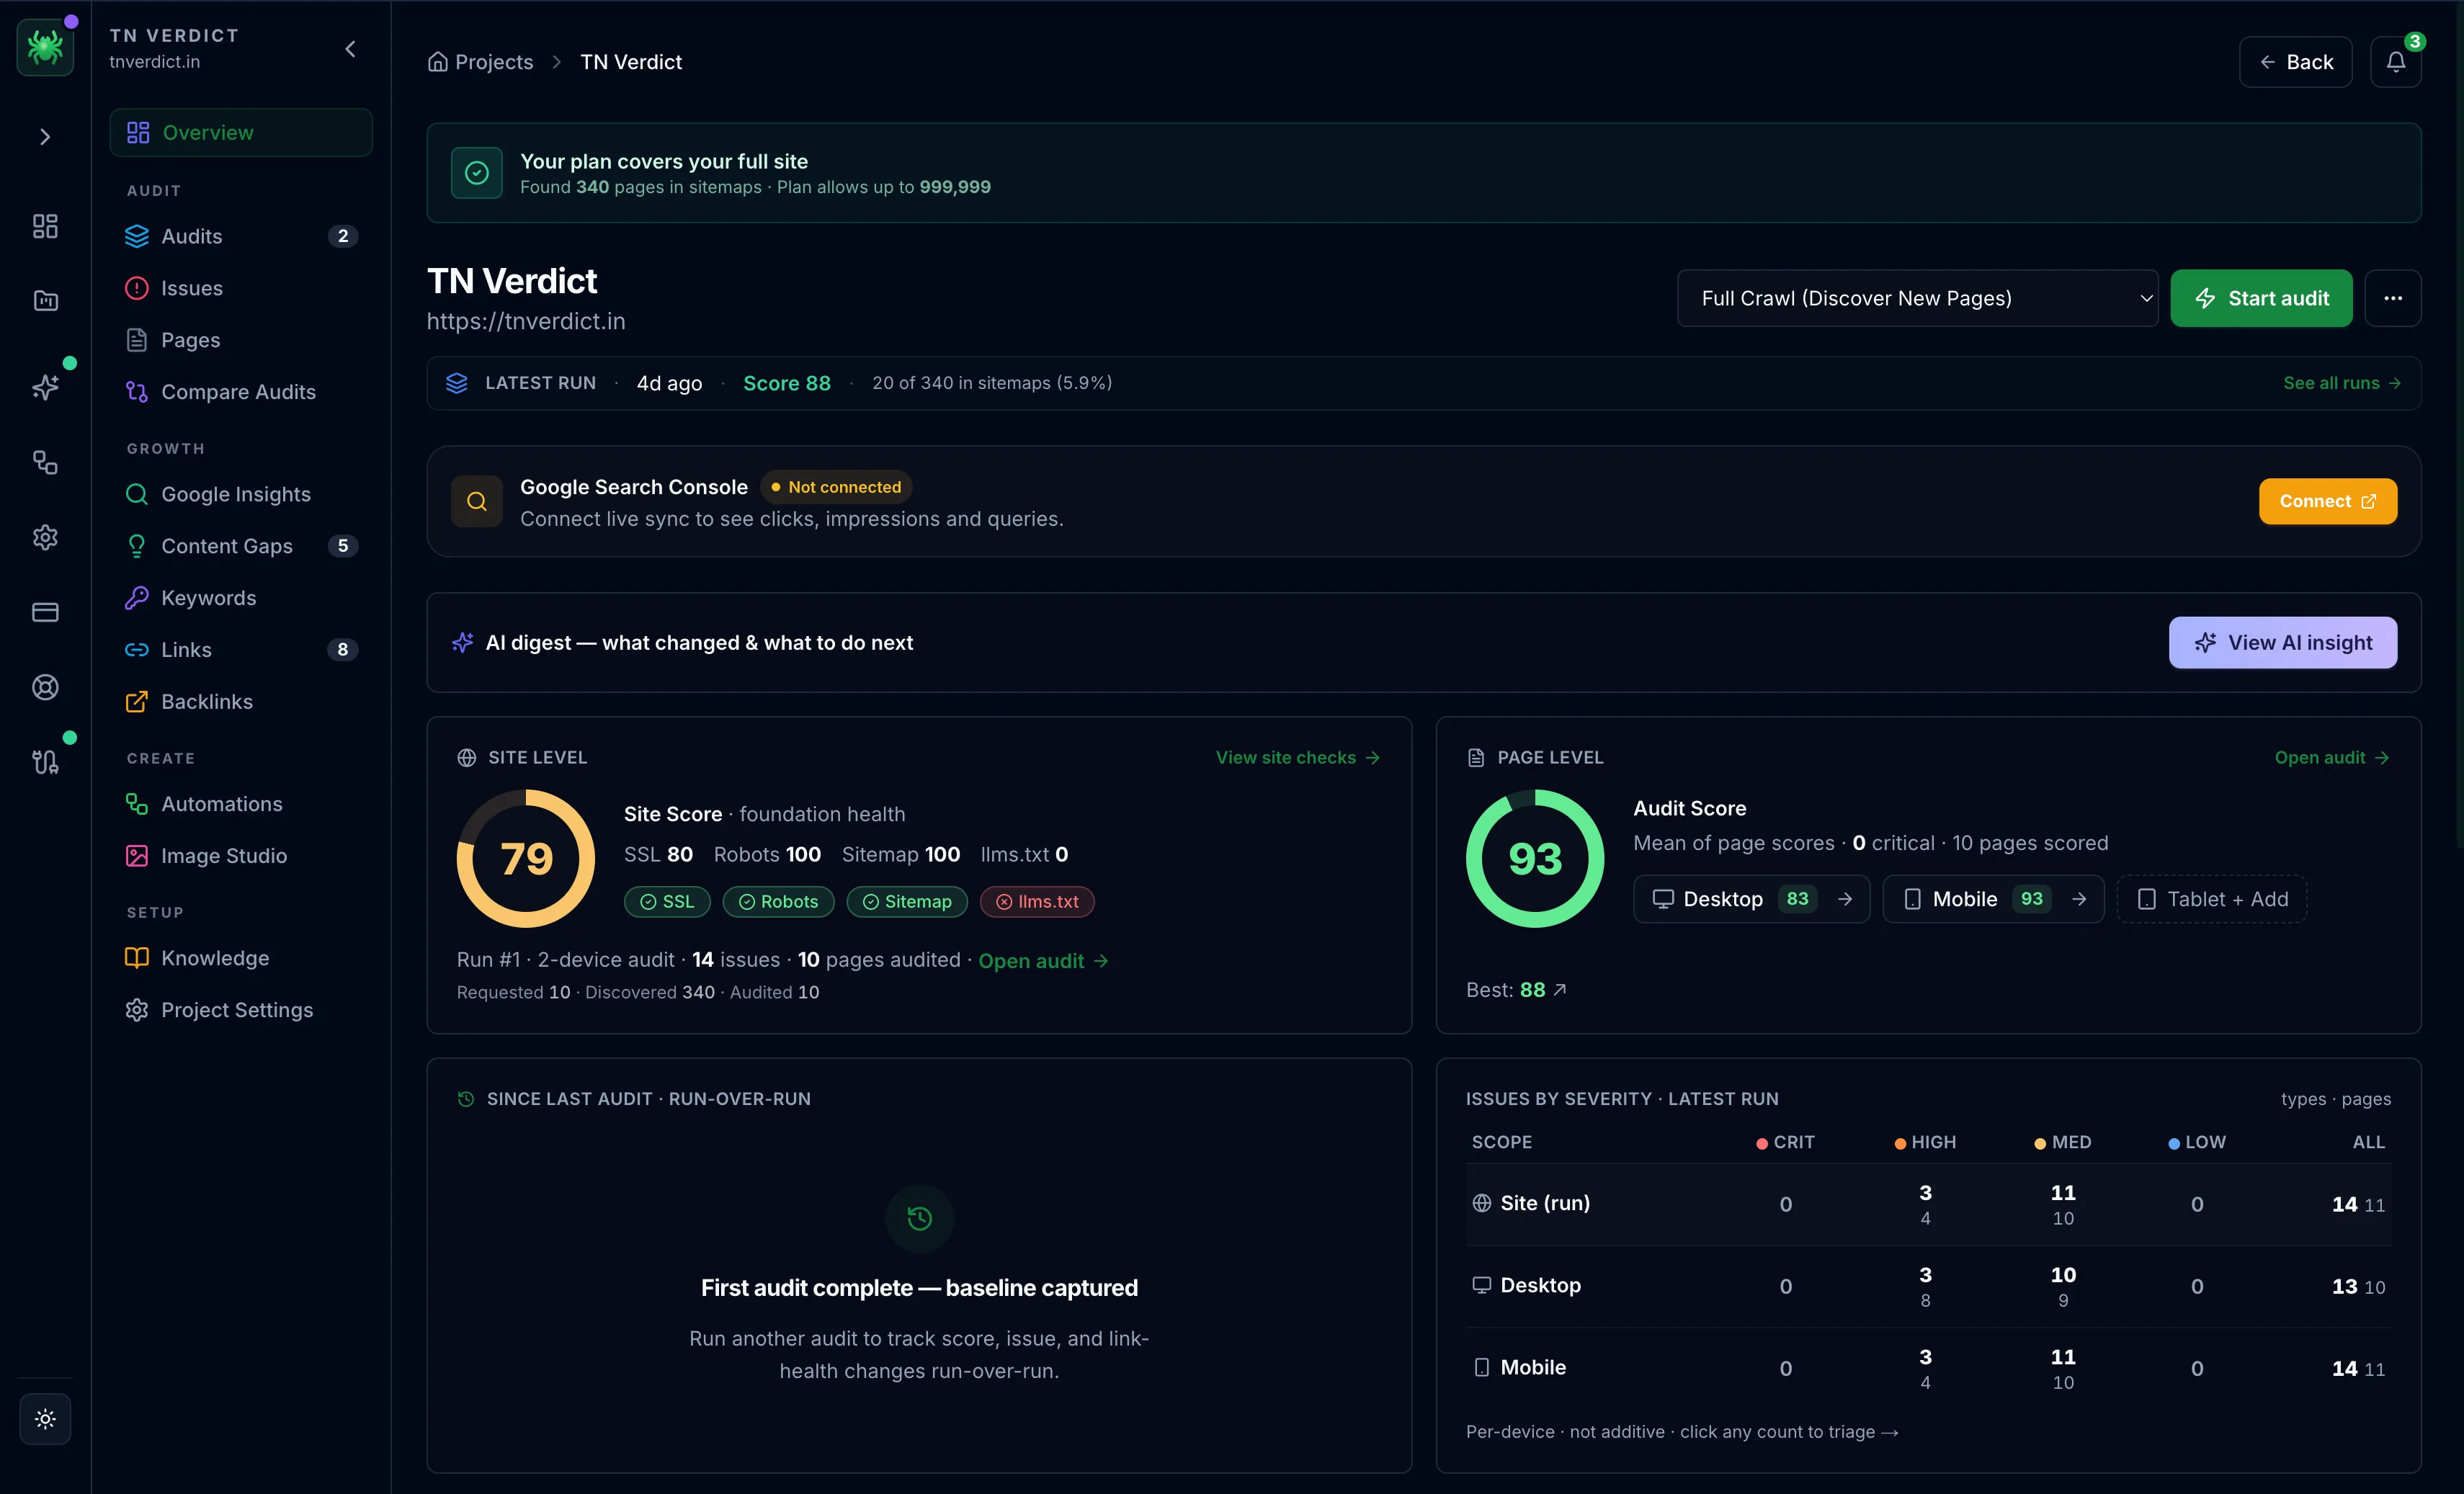
When the crawl finishes you land on the project Overview. The left sidebar carries the core loop — Overview, Audits, Issues, Pages, and Compare Audits — alongside growth and setup sections. The Overview leads with two gauges, Site Architecture and Page Score. Below them sit a severity breakdown and the top burning issues.
The Spider reports three distinct scores, so a single number never hides a device- or page-specific problem:
| Score | Answers | Where it shows |
|---|---|---|
| Page score | How healthy is this one URL? | Per-page reports |
| Device score | How does the site render per device type? | Overview, device breakdown |
| Site score | How healthy is the whole site? | Overview rollup |
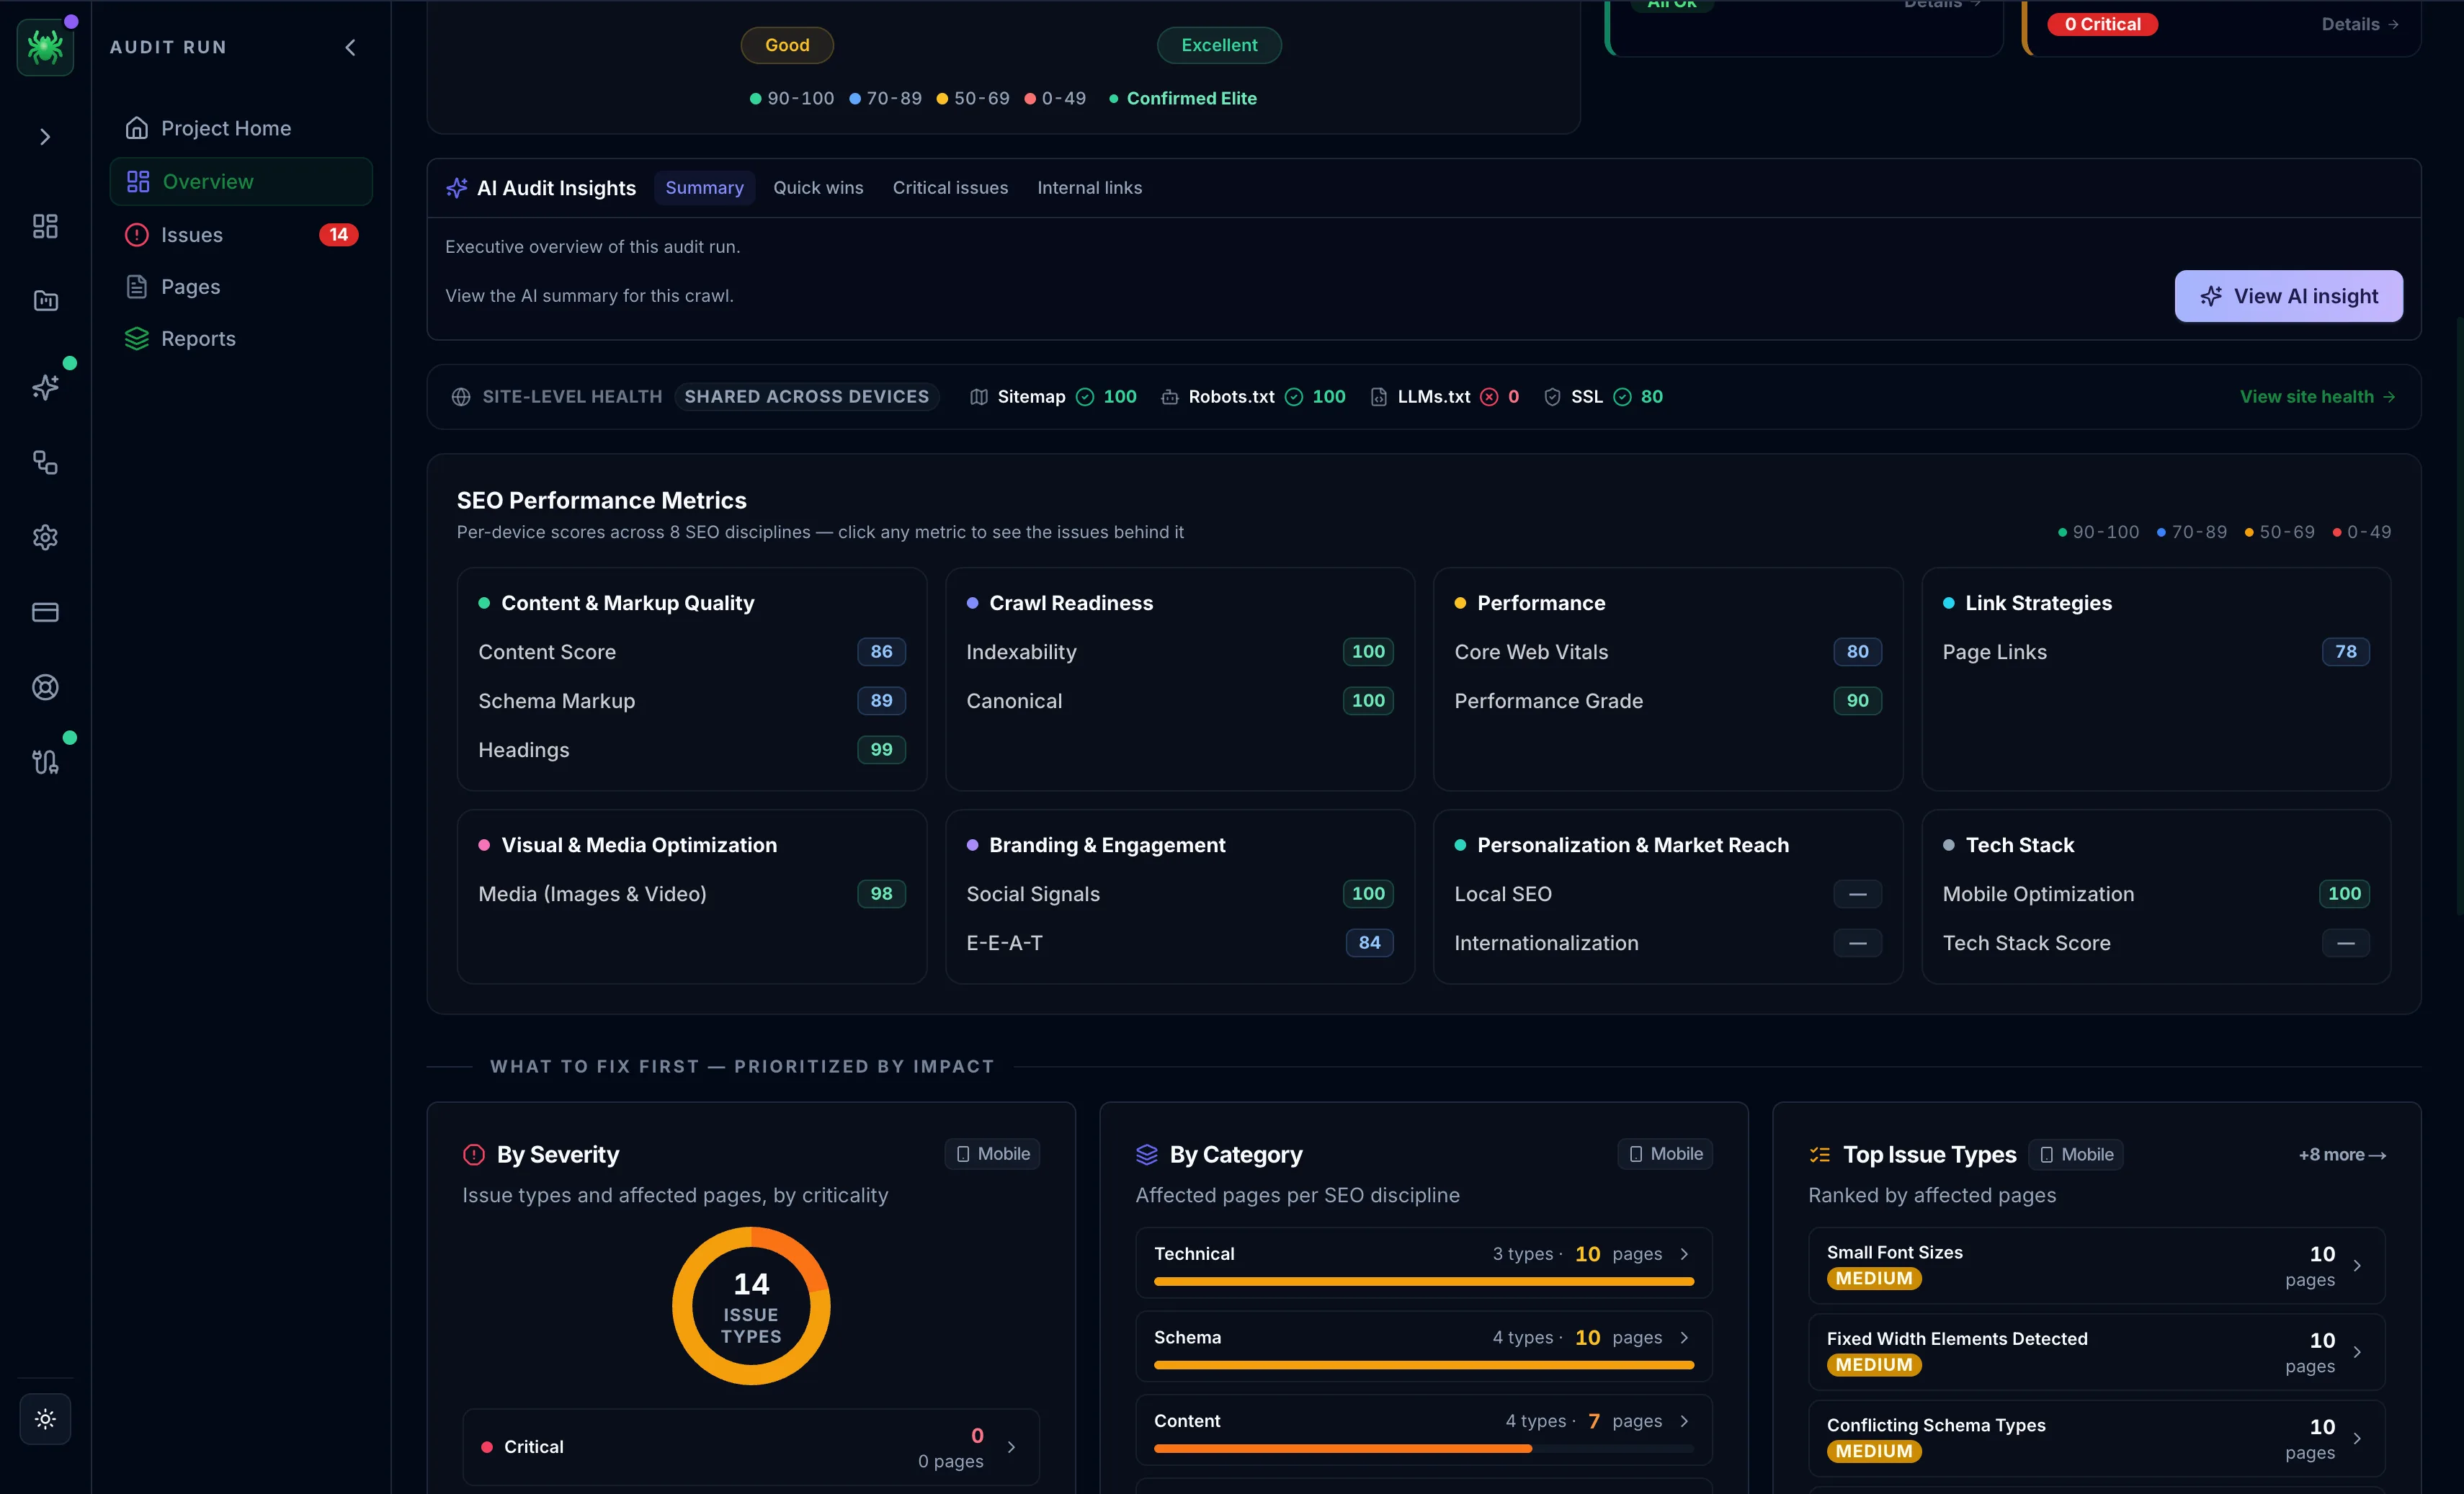
The audit-run Overview breaks each score into its contributing categories: content quality, crawl readiness, performance, link strategy, schema, and more. A What to fix first panel orders issues by impact rather than count. For how each score is calculated and what a good number looks like, see Checks & scores.
Step 5 — Work the issues
Open Issues. Findings are grouped by severity, so work top-down: errors first, then warnings, then notices. Each issue lists every affected URL, so a single fix to a shared template can clear the finding across hundreds of pages at once.
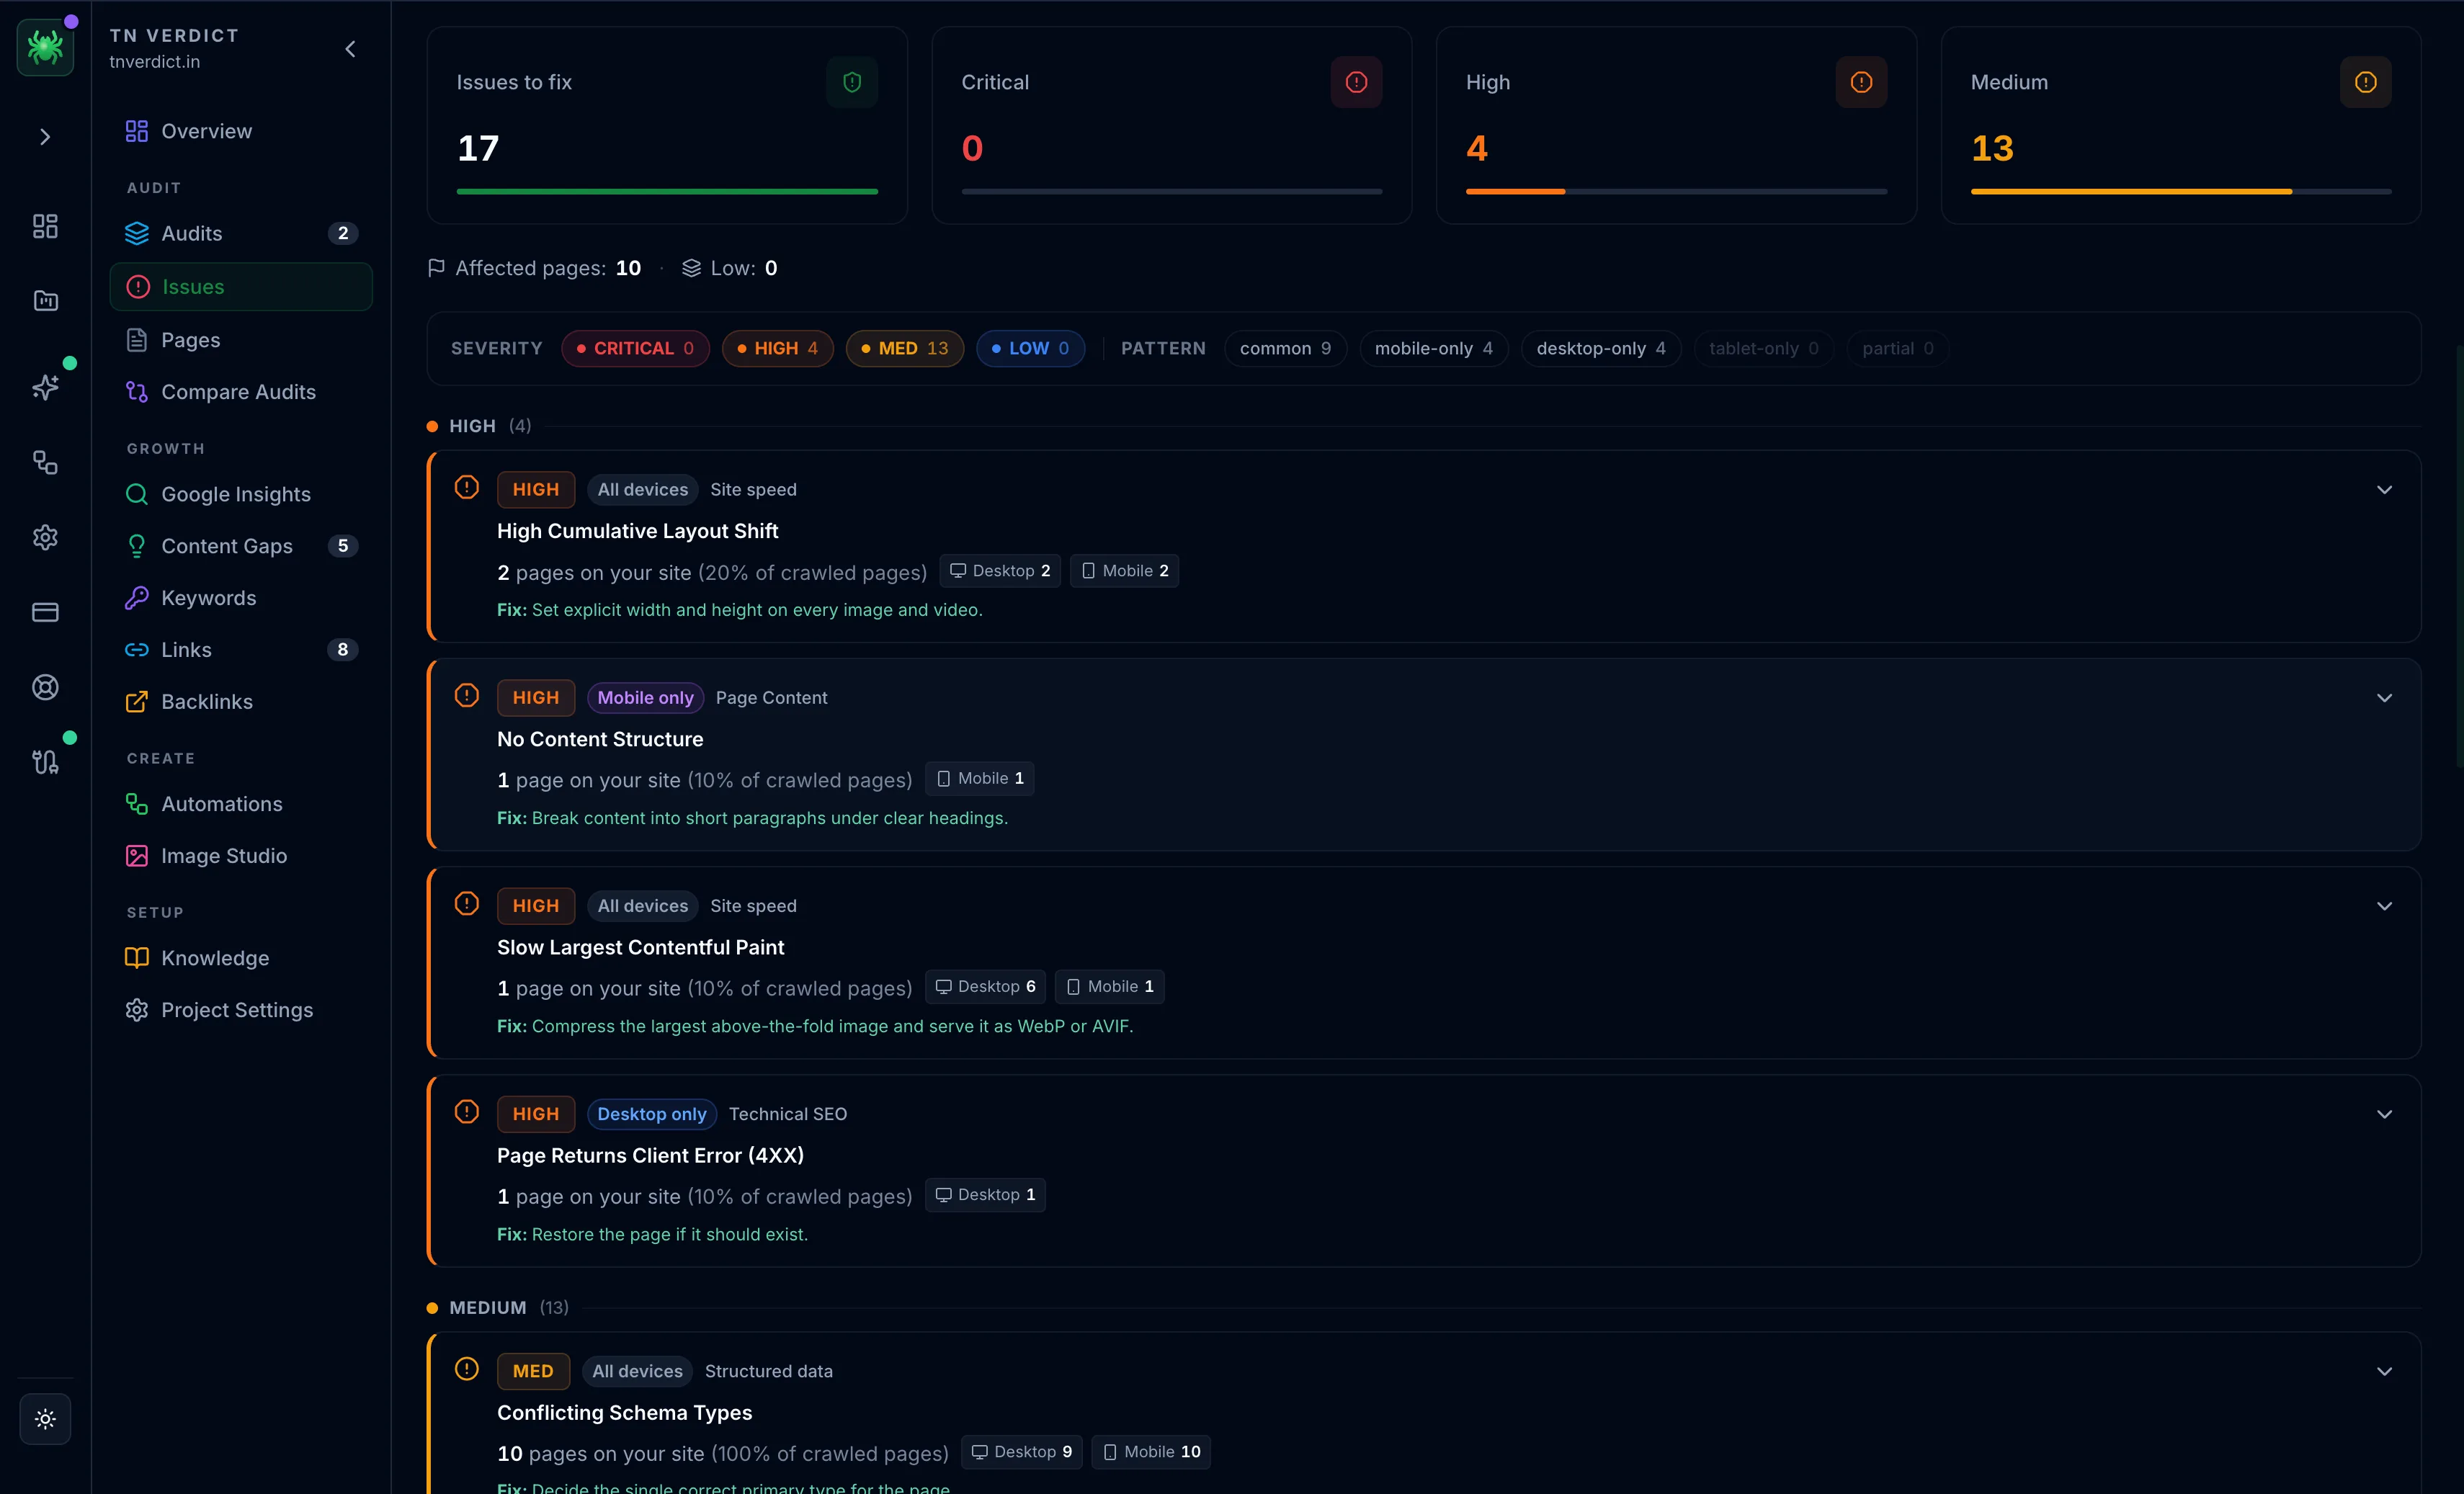
Work the list by severity:
| Severity | Meaning | Act when |
|---|---|---|
| Error | Actively blocking indexing or breaking pages | Immediately |
| Warning | Hurting quality or rankings | This sprint |
| Notice | Worth knowing, not urgent | When convenient |
Start with errors on your highest-traffic pages. Connect GSC (below) so the Spider can sort issues by the clicks actually at risk, not just severity.
Crawling gated sites
For staging or members-only sites behind a login, add authentication under the
project's Advanced → Network settings as custom HTTP headers. An
Authorization header (Bearer or Basic) or a Cookie header is passed with
every request. Custom headers are a Tracker feature.
Credentials live in the project configuration on your machine and are sent only to the site being crawled. They never reach Digispot's servers.
Next steps
- Weight issues by real traffic — connect Search Console and GA4 under the project's Google integrations. See Google integrations.
- Compare runs over time — re-crawl after fixes and use the comparison view to confirm issues dropped. See Issues.
- Let an AI agent query the crawl — the Spider ships an MCP server so Claude or Cursor can read this data directly. See MCP server.
- Need to share with a team? The Cloud Platform runs the same crawls on Digispot's servers with shared projects.